
Kubu Manual
Contents
- Purpose/Scope of the Document
- Product Guide
- Introduction – What is Kubu?
- Kubu Hub
- Kubu Door Sensor
- Door Sensor Setup & Operation Instructions
- Kubu Anywhere™ Pro Sensor
- Kubu Range Extender
- Safety Instructions
- Important Product Information
- Safety Information:
- Battery Safety
- Drawings & Parts List
- Home Hub
- Kubu Door Lock Sensor
- Kubu Window Lock Sensor
- Transportation
- Assembly & installation
- Operation
- Maintenance
- Dismantling
- Disposal
- Warnings
- Troubleshooting & Additional Support Information
- Troubleshooting Links
- Customer Care Contact
- Product Marking Details
- Kubu Hub Markings
- Power Adapter Markings
- Door Sensor Markings
- Window Sensor Markings
- Abbreviations
1. Purpose/Scope of the Document
This web page provides details & instructions for using the Kubu Smart Security System, along with details for the different markings provided on our devices.
2. Product Guide
2.1 Introduction – What is Kubu?
Kubu is a range of Smart Security Sensors that can monitor the status of a window or door lock in real-time.
The Kubu App provides the consumer with key information about the security of their home on a level that has never been delivered before. Kubu monitors, reports and provides full perimeter security through: Real-time Notifications, Smart Geofence Alerts and Scheduled Alerts, ensuring homeowners will never leave their home un-secure again.

2.2 Kubu Hub
The Kubu Hub is a wireless IoT Gateway that creates a wireless local network at Sub GHz, connecting to the Kubu Systems remote servers via your home WiFi network. It receives data from your sensors and relays that to your Smart device via the internet.
Kubu Hub – Technical Specification
- Power Supply – Mains AC supply (single phase)
- Communication – Zigbee / Wi-Fi
- Operating Temperature & Humidity – 0° to 60°C & 15% to 95% RH
- Environmental Protection Level – IP5X
Kubu Hub – Product Pictures
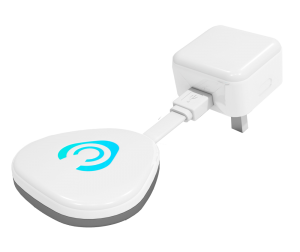
2.2.1 Hub Setup & Operation Instructions

1 x Power Adapter
1 x Kubu Smart Hub
1 x Quick Start Guide

Download the Kubu app from the App Store or Google Play.

Create your account on the Kubu App and verify it via an email link.

Connect your phone to your
Home WiFi Network.
Go to the WiFi settings on your phone and make sure your phone is connected to the home WiFi network.
Do NOT connect to the network: Kubuhomehub.

Unpack your smart hub and connect the USB into the power adapter.
Next, plug into a wall socket. The smart hub will start flashing.

To get maximum performance, make
sure the smart hub is in a good WiFi
spot and no more than 15m distance
from the doors or windows containing Kubu Sensors

Ensure your home WiFi network is showing and enter the password correctly.
Make sure you tick the box to set your SureSecure™ Geofence and never leave your door unlocked again!

Your Kubu home hub will now configure and connect to your home WiFi.
This may take around 1 minute.
When finished, it is time to setup your first Kubu Smart Sensor!
2.2.2 Kubu Hub Reconfiguration
You can re-configure the WiFi network settings of the Kubu Hub by pressing the button in the back of the Home Hub (see figure. 2.2.2.i) for more than 2 sec. The will place the Kubu Hub in configuration mode.

2.2.3 Kubu Hub LED Status Indicators
The Kubu Hub uses LED visual indicators to provide local status indications, without the use of a Smart Device. Details are in the below table.
| LED Status | Description |
| Purple Static | Home Hub is connected to the internet via WiFi |
| Blue Static | All sensors are in secure state |
| Amber Static | One or more sensors are in non-secure state |
| Amber fast flash | WiFi connection error & One or more sensors are in non-secure state |
| Blue fast flash | WiFi connection error & All sensors are in secure state |
| Slow flash any colour | Server/internet connection error – Contact Kubu Support |
| Purple & Amber alternate flashing | Configuration/Setup Mode for WiFi configuration |
| Blue flashing & Static Amber | Device connected to the access point in configuration node |
| Purple & Blue alternate flashing | Configuration/Setup Mode to link the Kubu Smart Sensor |
2.3 Kubu Door Sensor
The Kubu Door Sensor works with 3V coin cell batteries to transmit a signal using Zigbee to the Kubu Hub. These modules need to be installed/inserted into the appropriate slot in a multi-point door lock that ‘works with Kubu’ to detect the lock status and relay to the Kubu Hub.
Kubu Door Sensor – Technical Specification
- Sensor – External digital sensor
- Power Supply – Coin Cells (3.0V)
- Communication – Low Energy Bluetooth (direct to user’s phone) or Zigbee (using a hub)
- Operating Temperature & Humidity – 0° to 60°C & 15% to 95% RH
- Environmental Protection Level – IP64
Kubu Door Sensor – Product Pictures

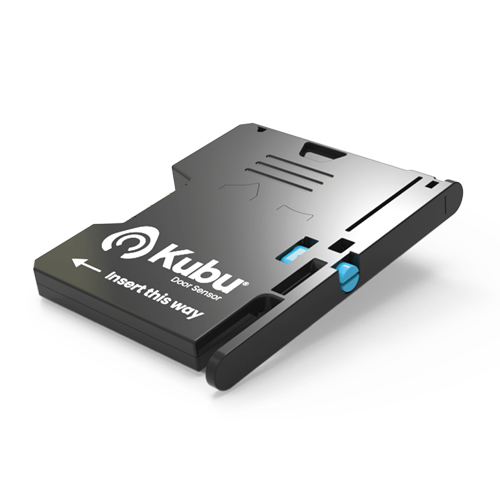
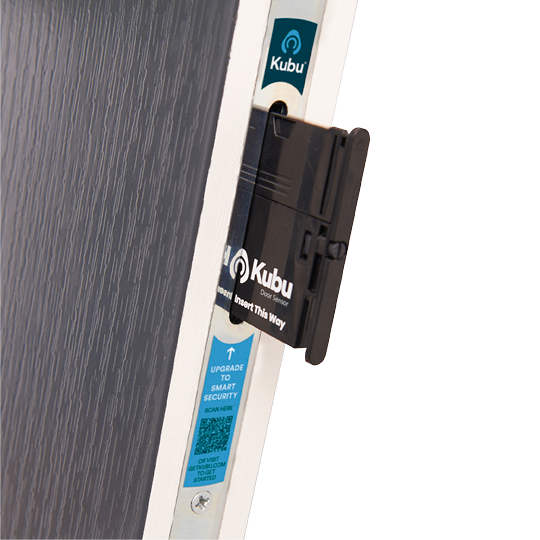
2.3.1 Door Sensor Setup & Operation Instructions
1 x Power Adapter
1 x Kubu Smart Hub
1 x Quick Start Guide
Download the Kubu app from the App Store or Google Play.
Create your account on the Kubu App and verify it via an email link.
Connect your phone to your
Home WiFi Network.
Go to the WiFi settings on your phone and make sure your phone is connected to the home WiFi network.
Do NOT connect to the network: Kubuhomehub.
Unpack your smart hub and connect the USB into the power adapter.
Next, plug into a wall socket. The smart hub will start flashing.
To get maximum performance, make
sure the smart hub is in a good WiFi
spot and no more than 15m distance
from the doors or windows containing Kubu Sensors
Ensure your home WiFi network is showing and enter the password correctly.
Make sure you tick the box to set your SureSecure™ Geofence and never leave your door unlocked again!
Your Kubu home hub will now configure and connect to your home WiFi.
This may take around 1 minute.
When finished, it is time to setup your first Kubu Smart Sensor!
2.5 Kubu Anywhere™ Pro Sensor
The Kubu Anywhere™ Pro Sensor is a compact smart sensor that can be retrofitted to doors and windows, letting you check from the Kubu app whether they are locked, unlocked or under attack.
Kubu Anywhere™ Pro Sensor – Technical Specification
- Power Supply – 2 x CR1632 batteries (supplied)
- Communication – Low Energy Bluetooth (direct to user’s phone) or Zigbee (using a hub)
- Operating Temperature & Humidity – 0° to 60°C & 15% to 95% RH
- Environmental Protection Level – IP54 (For indoor use ONLY)
Kubu Anywhere™ Pro Sensor – Product Pictures
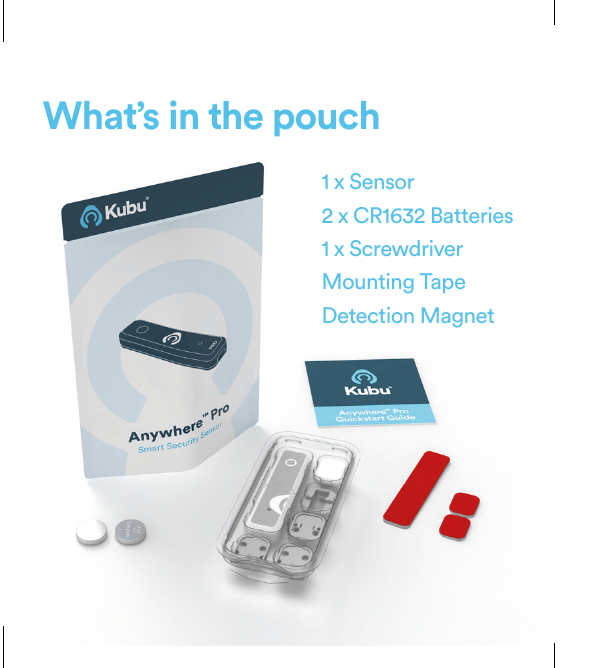
What’s in the pouch: 1 x Sensor, 2 x CR1632 batteries, 1 x screwdriver, mounting tape, detection magnet.
2.5.1 Anywhere™ Pro Sensor Setup & Operation Instructions
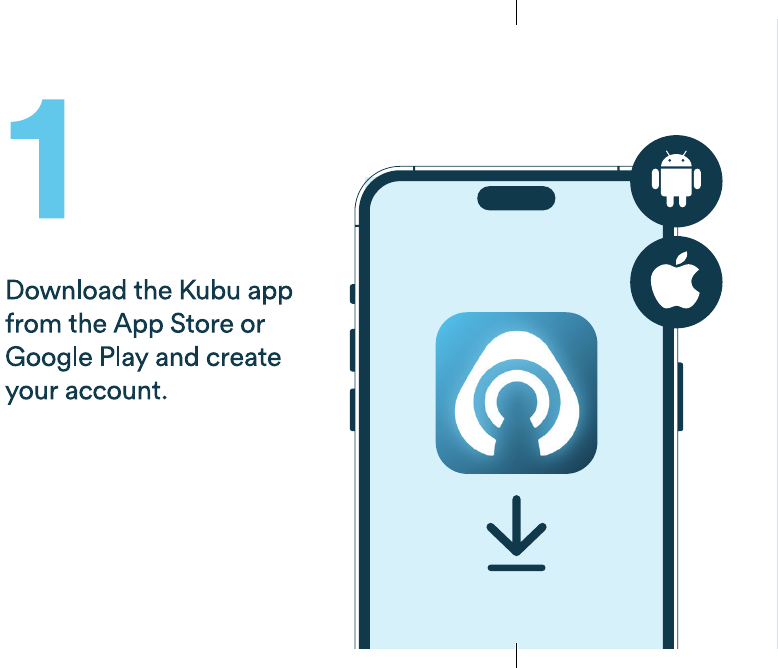
- Download the Kubu app from the App Store or Google Play and create your account.
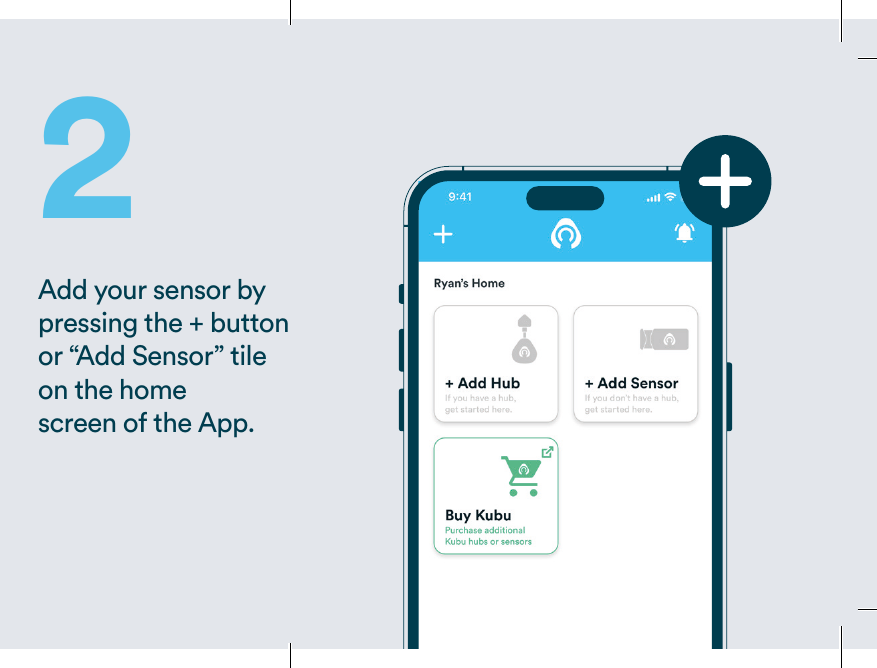
- Add your sensor by pressing the + button or “Add Sensor” tile on the home screen of the App.
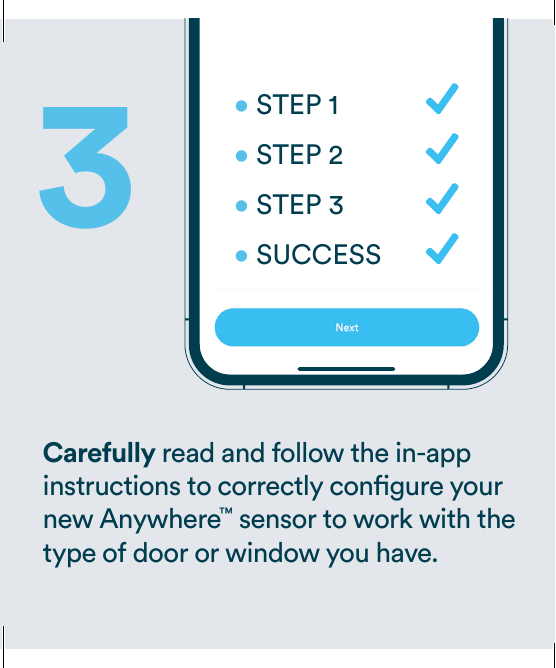
- Configure the sensor. Carefully read and follow the in-app instructions (Step 1, Step 2, Step 3, Success) to correctly configure your new Anywhere™ sensor to work with the type of door or window you have.
Before configuring in the app, fit the detection magnet to your door or window – see 2.5.2.
2.5.2 Anywhere™ Pro Magnet Fitting Guide
If your doors or windows are not built to ‘work with Kubu’, you will need to fit a detection magnet to your window or door. Your pouch contains two magnet options for retro-fitment. Decide which suits your needs before you start.
Step 1 – Select your magnet option
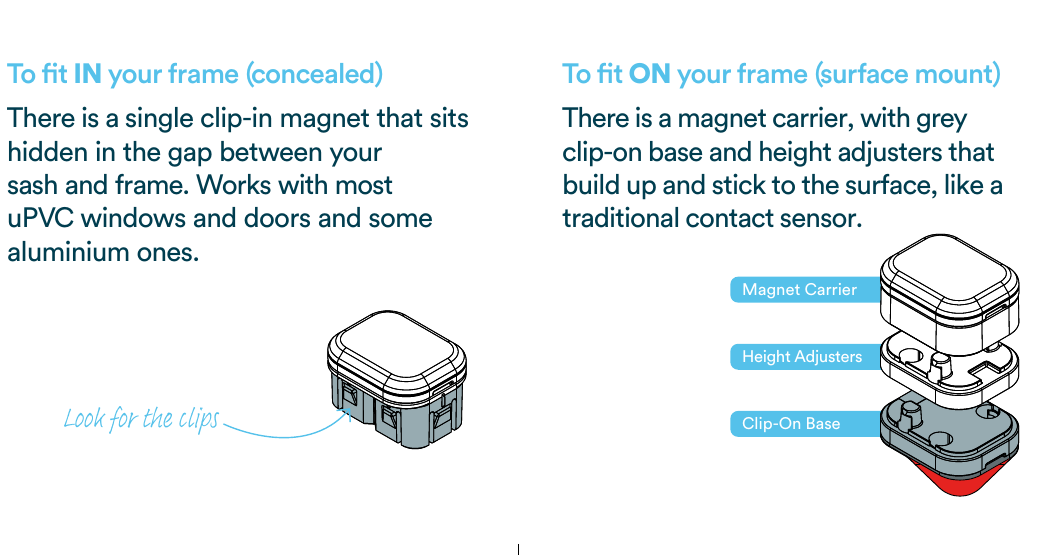
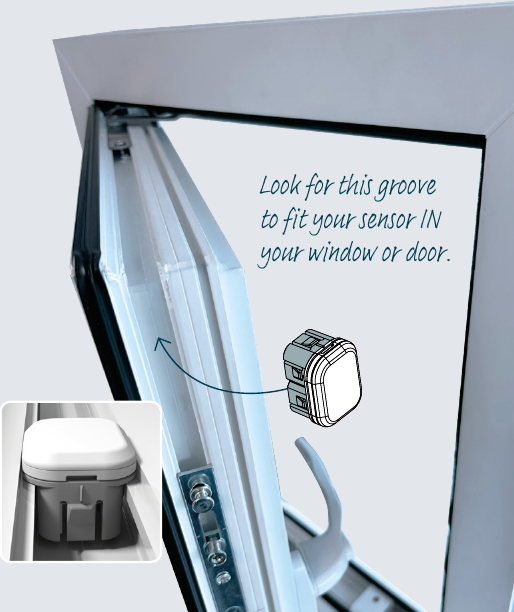
- Fit IN your frame (concealed): a single clip-in magnet that sits hidden in the gap between your sash and frame. Works with most uPVC windows and doors and some aluminium ones. (Look for the clips.)
- Fit ON your frame (surface mount): a magnet carrier with grey clip-on base and height adjusters that build up and stick to the surface, like a traditional contact sensor.
Which option do I need?
Look at the lock strap when your door or window is open. You can fit IN the frame if there’s a visible groove running along the edge (the same groove that the lock sits in) and there is room to clip a magnet into the groove. Alternatively, fit ON the frame if the groove is hidden, awkward, or there isn’t a clear area to clip in to.
This option suits pretty much every window or door. If in doubt, fitting ON the frame will always work.
Step 2a – To fit IN your frame
- With the window open, find a clear spot along the groove you have just identified. It should be fitted on the lock side (preferable), top, or bottom. Where possible, avoid fitting on the hinge side.
- Push the magnet firmly into the groove.
- Fit the sensor inside the frame directly opposite the magnet, so the two sit face to face when the window closes.
- Using the supplied double sided tape, peel the backing and press the sensor firmly onto a clean, dry surface.
Step 2b – To fit ON your frame
- Decide where on the frame the sensor will go (lock side, top or bottom). Using the supplied double sided tape, peel the backing, and press the sensor firmly onto the frame for 10 secs.
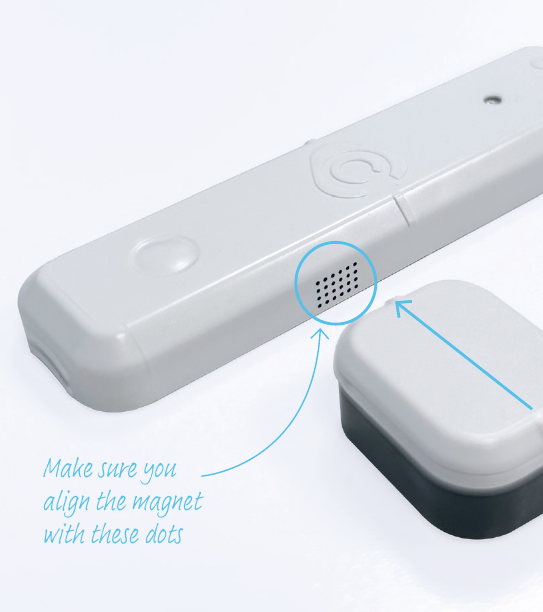
- The magnet must end up level with the sensor’s dotted markings, both up-and-down and side-to-side, with as small a gap as possible without the two touching when the window moves. Make sure you align the magnet with these dots.
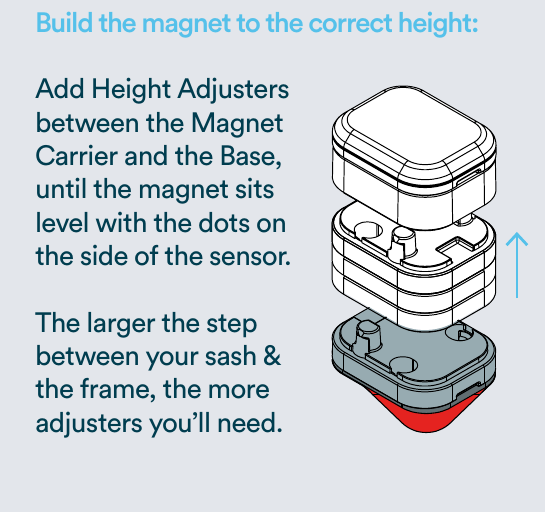
- Build the magnet to the correct height: add Height Adjusters between the Magnet Carrier and the Base, until the magnet sits level with the dots on the side of the sensor. The larger the step between your sash & the frame, the more adjusters you’ll need.
- Hold the assembly in place to check the alignment, before peeling the red backing, and pressing the magnet assembly firmly in place on the sash (opening window) for 10 secs.
That’s the fitting done. Open the Kubu app to continue your setup.
2.6 Kubu Range Extender
The Kubu Range Extender works in conjunction with your Kubu Hub to ensure the reliability of your sensors in harder to reach areas of your home.
Kubu Range Extender – Technical Specification
- Power Supply – Mains AC supply (single phase)
- Communication – Low Energy Bluetooth (direct to user’s phone) or Zigbee (using a hub)
- Operating Temperature & Humidity – 0° to 60°C & 15% to 95% RH
- Environmental Protection Level – IP54 (For indoor use ONLY)
Kubu Range Extender – Product Pictures
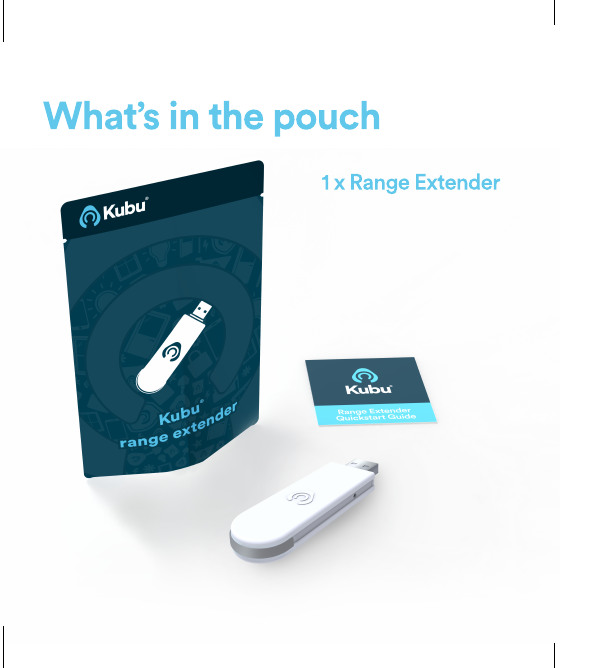
What’s in the pouch: 1 x Range Extender.
2.6.1 Range Extender Setup & Operation Instructions
- Download the Kubu app from the App Store or Google Play and create your account.
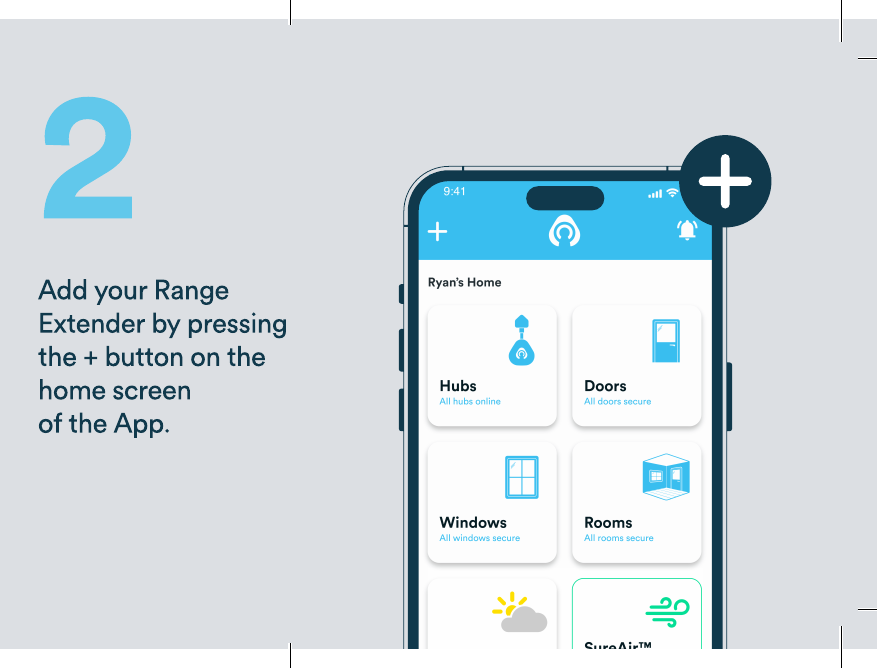
- Add your Range Extender by pressing the + button on the home screen of the App.
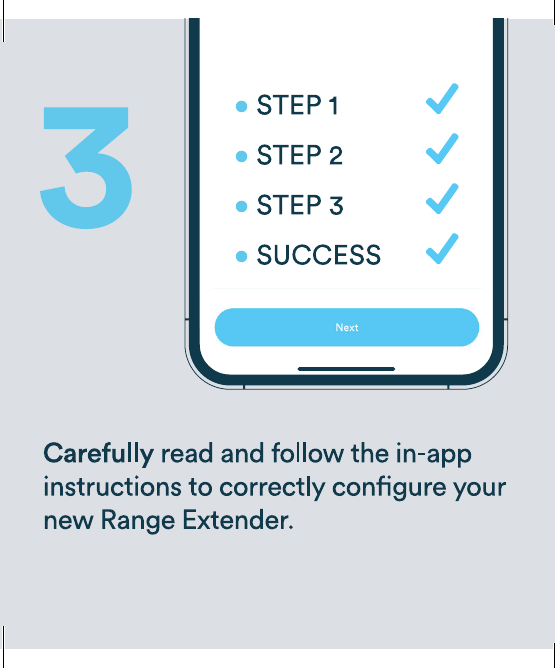
- Configure the Range Extender. Carefully read and follow the in-app instructions (Step 1, Step 2, Step 3, Success) to correctly configure your new Range Extender.
3. Safety Instructions
3.1 Important Product Information
Failure to read and follow these safety instructions before operation could result in injury or damage.
The product package contains accessories that may cause a choking hazard to children. Keep out of reach of children.
3.2 Safety Information:
Kubu Smart security devices are suitable for indoor use only. Please do not use them for any outdoor applications. In any case, do not intentionally submerge or immerse your devices into water or any other liquids.
- Do not spill any food or beverages on your Kubu devices.
- Do not attempt to clean or polish or expose your Kubu devices to oil, lotion, or other abrasive substances.
- Do not expose your Kubu devices to salt water or other conductive liquids.
- Do not expose your Kubu devices to pressurised water, high velocity water, or extremely humid conditions (such as a steam room).
- If your Kubu devices gets wet, carefully power them OFF without getting your hands wet and wait for it to dry completely before powering ON them.
- Do not attempt to dry your Kubu devices with an external heat source, such as a microwave oven or a hair dryer.
- To avoid risk of electric shock, do not touch Kubu Hub adapter plug pins while plugging/unplugging.
- To avoid risk of electric shock during a lightning storm while your device or adapter is plugged in, do not touch Kubu Hub adapter plug. If your Kubu devices appear to be damaged, discontinue use immediately and contact customer support for further assistance.
- The Kubu devices does not contain any serviceable or replaceable parts. Do not open the housing or disassemble the devices. Protect your devices from direct sunlight. Handle your devices and the accessories with care.
- Use only accessories supplied with your Kubu devices, or specifically marketed for use with your devices, to power your devices. Use of third-party accessories may impact your device’s performance. In limited circumstances, use of third-party accessories may void your device’s limited warranty. In addition, use of incompatible third party accessories may cause damage to your device or the third-party accessory. Read all safety instructions for any accessories before using with your Kubu devices.
- Keep the Kubu devices away from heat sources, especially when they are in use.
3.3 Battery Safety
The Kubu sensors use the non-rechargeable coin cells which should be replaced for sensors to continue working when they are discharged. Use the recommended steps to replace the battery and dispose the dead battery.
Avoid throwing away the used batteries alongside with your regular household waste. When batteries end up at landfill sites, the chemicals and hazardous materials from the battery contaminate the landfill site, contributing to air, water, and soil pollution.
The best way to dispose the batteries is to find a local battery recycling service
4. Drawings & Parts List
4.1 Home Hub
4.2 Kubu Door Lock Sensor
4.3 Kubu Window Lock Sensor
5. Transportation
{Information required}
6. Assembly & Installation
Product assembly for doors and windows that ‘Work with Kubu’ is already covered in the Section 2 above within the installation instructions.
7. Operation
Product operation & usage details can be found in Section 2 above within the installation instructions.
8. Maintenance
Door and Window locks that “Work with Kubu®” must be maintained in order for Kubu® to work effectively over its warranty period of x1 year.
Your “Works with Kubu” lock, together with your window or door have their own maintenance details see below:
With direct reference to the Kubu Door Lock & Kubu Window Lock Sensor units, special care and maintenance must be taken when replacing the batteries in order not to break the battery holding features.
With direct reference to the Kubu Door Lock & Kubu Window Lock Sensor units, the consumer must replace the batteries when the power is indicated as low or critical on the mobile app.
9. Dismantling
Kubu Smart Security products do not require dismantling or dis-assembling by the end user, however they should be disposed of as per the below guidelines.
10. Disposal
Kubu devices must be disposed of separately from general household waste. When Kubu devices reach the end of their lifespan, they must be taken to a designated waste collection point for safe disposal and/or recycling. This conserves natural resources, protects human health, and helps the environment.
10.1 Warning
- Do not dispose of the battery or the product with the battery into fire as it could lead to explosion.
- When you don’t use the product for the long time, please take out the batteries to avoid energy waste or damage caused by the possible battery leakage.
11. Troubleshooting & Additional Support Information
11.1 Troubleshooting Topics
Please refer to the various sections of our Support Pages for further guidance if required, covering the below topics:
- How Kubu Works
- Frequently Asked Questions
- Device & Network Compatibility
- Account Set Up & Management
- Maintenance Information
- Tech Support – Set up
- Tech Support – Using Kubu
11.2 Customer Care Contact
For an accelerated service, please have the following ready:
- Your Kubu account email ID.
- Your Kubu door or window sensor ID number.
This can be found by selecting the sensor in the app and choosing ‘details’.
Email support: support@kubu-home.com
Trade enquiry: trade@kubu-home.com
Hours of Operation:
Monday – Friday: 8.30am – 5.00pm (UK)
Live email support on Saturday: 9:00am – 11.00am (UK)
12. Product Marking Details
12.1 Kubu Hub Markings
| Marking/Symbol | Information |
| Kubu Smart Brand Logo (Trademark) | |
| RoHS Compliance Marking | |
| UK Conformity Assessed | CE Conformity for Home Hub | |
| Electrical equipment designed primarily for indoor use marking | |
| Waste Electrical and Electronic Equipment Directive marking | |
| Input voltage & current rating for Home Hub | |
| Build batch number for Home Hub |
12.2 Power Adapter Markings
| Marking/Symbol | Information |
| Kubu Smart Brand Logo (Trademark) | |
| CE Conformity for power adapter | |
| Class || or double insulated for power adapter (It does not require a safety connection to earth DC output wires are isolated from the AC input) | |
| Adapter module nameAdapter model part numberInput voltage range and frequency & Input current rating Maximum output voltage and current | |
| The power adapter is to be used for domestic indoors only | |
| RoHS Compliance marking | |
| Waste Electrical and Electronic Equipment Directive marking |
12.3 Door Sensor Markings
| Marking/Symbol | Information |
| Kubu Smart Brand Logo & Device name for Door Lock Sensor. (Trademark) | |
| Direction for door sensor installation |
12.4 Anywhere Pro Sensor Markings
| Marking/Symbol | Information |
| Kubu Smart Brand Logo & Device name for Door Lock Sensor. (Trademark) | |
| Battery holder lock and unlock marking |
13. Abbreviations
| # | Abbreviation | Details |
| 1 | IoT | Internet Of Things |
| 2 | AC | Alternating Current |
| 3 | WiFi | Wireless Fidelity |
| 4 | LED | Light Emitting Diode |
| 5 | FAQ | Frequently Asked Questions |
| 6 | RoHS | Restriction of Hazardous Substances |